Зрелищные переходы ImageDissolve
Для этих переходов используются другие изображения. В сообществе ренпая я добавлял архив с кучей изображений для создания эффектов начиная от телепорта….до перехода виде сердечки для хэппи-эндов(около 200 картин)
https://vk.com/topic-7553243_31474171?post=8461
подбирайте именно подходящие для вас эффекты(Не забудьте изображению-переходу дать такое же разрешение как и ваш проект).
Для добавления эффекта вам следует прописать через init : сам эффект с ссылкой на картину
Ниже пример:
· init:
· $ pic = ImageDissolve ("id_circleiris.png", 1.0, 8) ### открыли . " id _ circleiris . png " – путь к картинке
· $ pic2 = ImageDissolve("id_circleiris.png", 1.0, 8, reverse=True) ### закрыли
И в игре переход вызываем with pic

и эффект закрытых глаз готов
Move
Ранее мы изучали переход with move и как поменять положение персонажа на экране.
Теперь давайте перейдем к командам move более подробно.
1) with moveout – изображения изчезают за экран
Что бы его использовать к with moveout дописываются стандартные имена позиций
Например left и персонаж изчезнет влево
Hide rish _1
with moveoutleft - спрайт исчез влево(hide – убрать)
2) with movein – Изображение появилось с определенной стророны. Все аналогично предыдущему переходу только на появление
Примеры
with moveinbottom – персонаж что то делает снизу
with moveinright - персонаж что то делает справо
with moveintop - персонаж что то делает сверху(спрайт вверх ногами)
И еще куча переходов, что бы выбрать вам понравившуюся, посмотрите обязательно обучение ренпая. Ибо писать очень много
|
|
|
Как задать время переходам
Можно задавать время для каждого перемещения в блоке инициализации, а можно и "на лету":
init python:
mtime = 1.5 # время в пути
moveinleft = MoveTransition(mtime, enter=_moveleft)
moveinright = MoveTransition(mtime, enter=_moveright)
moveoutleft = MoveTransition(mtime, leave=_moveleft)
moveoutright = MoveTransition(mtime, leave=_moveright)
init:
image t = Text("{size=128}@")
label start:
show t with moveinleft
hide t with moveoutright
show t with moveinright
# а можно прямо так, если нужно поменять "время в пути" на лету:
hide t with MoveTransition(2.0, leave=_moveright)
return
Но проще всего задать время для всех перемещений сразу:
init:
$ define.move_transitions('move', 2.0)
Операции над изображением
Здесь те команды, которые позволяют нам манипулировать над изображениями.
1) Crop 
· image imy_ssilka crop = im.Crop("logo.png", 0, 0, 100, 307)
· label start:
· show imy_ssilka
Im . Composite

· image logo composite = im.Composite((200, 407),
· (0, 0), "logo.png",
· (0, 50), "logo.png",
· (0, 100), "logo.png")
LiveComposite
Как и предыдущий оператор, только может использовать еще анимации
· image logo livecomposite = LiveComposite((200, 407),
· (0, 0), anim.Blink(Image("logo.png")),
|
|
|
· (0, 50), "logo.png",
· (0, 100), "logo.png")
Im.Scale
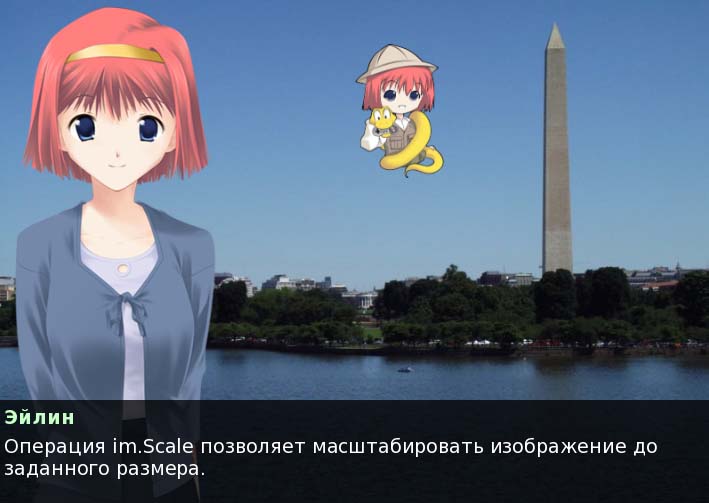
· image logo scale = im.Scale("logo.png", 100, 150)
Im.FactorScale
image logo factorscale = im.FactorScale("logo.png", 1.5, 1.5)

Im.Map
image logo green = im.Map("logo.png", rmap=im.ramp(0, 0))

В данном случае убрали все красное
Im . Recolor
Тоже самое что и im.Map но более эффективна при линейной обработке.
image logo green2 = im.Recolor("logo.png", 0, 255, 255, 255)
MatrixColor
Позволяет изменять цвета и насыщеность
Тусклый оттенок
· image logo halfsat = im.MatrixColor("logo.png",im.matrix.saturation(.5))
Инвертировать оттенок
· image logo invert = im.MatrixColor("logo.png",
· [ -1, 0, 0, 0, 1,
· 0, -1, 0, 0, 1,
· 0, 0, -1, 0, 1,
· 0, 0, 0, 1, 0, ])

Тем кто хорошо знаком с питоном вот записи из офф руковод
An image operator that uses matrix to linearly transform the image manipulator im.
Matrix should be a list, tuple, or im.matrix() that is 20 or 25 elements long. If the object has 25 elements, then elements past the 20th are ignored.
When the four components of the source color are R, G, B, and A, which range from 0.0 to 1.0; the four components of the transformed color are R', G', B', and A', with the same range; and the elements of the matrix are named:
[ a, b, c, d, e, f, g, h, i, j, k, l, m, n, o, p, q, r, s, t ]the transformed colors can be computed with the formula:
R' = (a * R) + (b * G) + (c * B) + (d * A) + eG' = (f * R) + (g * G) + (h * B) + (i * A) + jB' = (k * R) + (l * G) + (m * B) + (n * A) + oA' = (p * R) + (q * G) + (r * B) + (s * A) + tThe components of the transformed color are clamped to the range [0.0, 1.0].
|
|
|
im.matrix()
Constructs an im.matrix object from matrix. im.matrix objects support The operations supported are matrix multiplication, scalar multiplication, element-wise addition, and element-wise subtraction. These operations are invoked using the standard mathematical operators (*, *, +, and -, respectively). If two im.matrix objects are multiplied, matrix multiplication is performed, otherwise scalar multiplication is used.
matrix is a 20 or 25 element list or tuple. If it is 20 elements long, it is padded with (0, 0, 0, 0, 1) to make a 5x5 matrix, suitable for multiplication.
im.matrix.brightness(b)
Returns an im.matrix that alters the brightness of an image.
b
The amount of change in image brightness. This should be a number between -1 and 1, with -1 the darkest possible image and 1 the brightest.
im.matrix.colorize(black_color, white_color)
Returns an im.matrix that colorizes a black and white image. black_color and white_color are Ren'Py style colors, so they may be specified as strings or tuples of (0-255) color values.
# This makes black colors red, and white colors blue.
image logo colored = im.MatrixColor(
"bwlogo.png",
im.matrix.colorize("#f00", "#00f"))
im.matrix.contrast(c)
Returns an im.matrix that alters the contrast of an image. c should be greater than 0.0, with values between 0.0 and 1.0 decreasing contrast, and values greater than 1.0 increasing contrast.
im.matrix.desaturate()
Returns an im.matrix that desaturates the image (makes it grayscale). This is equivalent to calling im.matrix.saturation(0).
im.matrix.hue(h)
Returns an im.matrix that rotates the hue by h degrees, while preserving luminosity.
im.matrix.identity()
Returns an identity matrix, one that does not change color or alpha.
im.matrix.invert()
Returns an im.matrix that inverts the red, green, and blue channels of the image without changing the alpha channel.
|
|
|
im.matrix.opacity(o)
Returns an im.matrix that alters the opacity of an image. An o of 0.0 is fully transparent, while 1.0 is fully opaque.
im.matrix.saturation(level, desat=(0.2126, 0.7152, 0.0722))
Returns an im.matrix that alters the saturation of an image. The alpha channel is untouched.
level
The amount of saturation in the resulting image. 1.0 is the unaltered image, while 0.0 is grayscale.
desat
This is a 3-element tuple that controls how much of the red, green, and blue channels will be placed into all three channels of a fully desaturated image. The default is based on the constants used for the luminance channel of an NTSC television signal. Since the human eye is mostly sensitive to green, more of the green channel is kept then the other two channels.
im.matrix.tint(r, g, b)
Returns an im.matrix that tints an image, without changing the alpha channel. r, g, and b should be numbers between 0 and 1, and control what fraction of the given channel is placed into the final image. (For example, if r is .5, and the value of the red channel is 100, the transformed color will have a red value of 50.)
Im.Grayscale

image logo grayscale = im.Grayscale("logo.png")
Im.Sepia

Старые воспоминания и фотографии
image logo sepia = im . Sepia (" logo . png ")
Im.Alpha

image logo alpha = im.Alpha("logo.png", 0.5)
Эффект призрака
Im.Flip

image eileen flip = im.Flip("images/eileen happy.png", vertical=True)
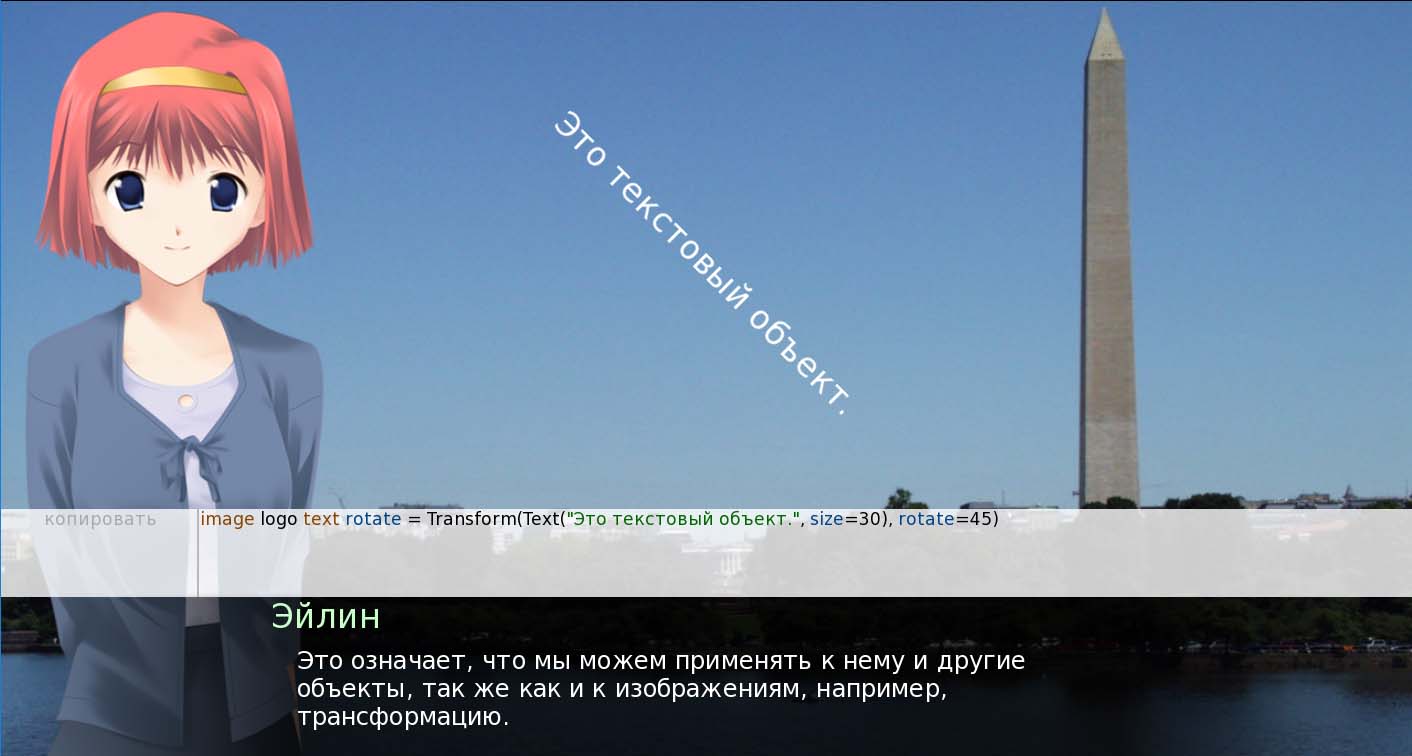
Text
Использовать текст как изображение
image logo text = Text (_("Это текстовый обьект."), size =30)
или еще
Режим Nvl
Данный режим выставляет на весь экран текст, а не выставляет его в нижней части экрана на специальную рамку(речь идет о режиме ADV)
Самый простой способ выставить его – прописать в персонаже
define nvle = Character(_("Eileen"), color="#c8ffc8", kind=nvl)
define misli = Character(None, color="#c8ffc8", kind=nvl)
В отличии от экрана ADV - Nvl периодически необходимо чистить от диалогов. Делается это все командой
label start:
….misli "Мысли"
….mvle "Диалог"
…. nvl clear
Что бы убрать и показать переход NVL используют
nvl hide dissolve
nvl show dissolve
Так же в этом режиме можно использовать меню выбора, для этого вам потребуется прописать
init -1 python hide:
define menu = nvl_menu
Menu:
nvle "NVL-mode"
"Yes.":
nvl clear
nvle "Good!"
"No.":
nvl clear
nvle "Well"
Дата добавления: 2018-10-27; просмотров: 796; Мы поможем в написании вашей работы! |

Мы поможем в написании ваших работ!